Documentation
This documentation is a work in progress. Check out videos on the ultraPacer YouTube Channel. Feature requests or issue/bug reports? Suggest, vote, and comment in the Feedback Hub.
Anything else? Contact me directly.
This guide will walk you through creating courses and plans for timed events, where runners complete as many loops of a course as possible within a specified time period (e.g., 6-hour, 12-hour, or 24-hour races).
Understanding Timed Events
Timed events differ from distance-based ultramarathons in that the race duration is fixed, but the total distance is variable based on how many loops each runner completes. Examples include:
- 6-hour races - Complete as many loops as possible in 6 hours
- 12-hour races - Complete as many loops as possible in 12 hours
- 24-hour races - Complete as many loops as possible in 24 hours
- Multi-day events - Events like backyard ultras or other fixed-time formats
Current Approach
While ultraPacer’s architecture is primarily designed for distance-based events, you can create plans for timed events using a workaround that involves creating “looped courses” with a specific number of loops.
Step-by-Step: Creating a Timed Event Plan
Step 1: Find or Create the Loop Course
If the timed event course doesn’t already exist on ultraPacer:
- Log in to your ultraPacer account
- Go to your Dashboard and click “Create course”
- Upload the GPX file for a single loop of the course
- In Step 2: Source data, enable the “Loop Course” option
- Set the number of loops to 1 initially (you’ll create copies with different loop counts later)
- Complete the remaining course creation steps (waypoints, terrain, etc.)
- Make sure the course is Public if you plan to share it
For more details on creating courses, see the Create/Modify Courses documentation.
Step 2: Copy the Course for Your Target Distance
To create a plan for a specific distance goal (e.g., 60 miles in 24 hours):
- Go to the course page for your single-loop course
- Click “Actions” at the top
- Select “Copy course”
- This opens the course edit form pre-populated with the original course data
Step 3: Set the Number of Loops
In the course edit form for your new copy:
- Navigate to “Step 2: Source data”
- Enable the “Loop Course” option if not already enabled
- Set the number of loops to match your target distance
- For example, if the loop is 3 miles and you want to plan for 60 miles, set loops to 20
- Or if the loop is 5 km and you want 100 km, set loops to 20
- Optionally, rename the course to reflect the distance, such as “60 Mile Dark Anchor Plan” or “100K Timed Event”
- Complete the form and save
Step 4: Create a Pacing Plan
Now create a plan for the specific time duration:
- On your copied course page, switch to the Planning view
- Click “New plan” (or select it from the Actions menu)
- Choose “Elapsed time” as your pacing method
- Enter your target time for the event duration
- For a 24-hour event, enter 24:00:00
- For a 12-hour event, enter 12:00:00
- For a 6-hour event, enter 06:00:00
- Set your Aid Station Delay based on how long you plan to spend at aid stations per loop
- Enter the Start Date/Time and timezone for accurate sunrise/sunset calculations
- Configure other settings like Heat factor and Pacing Strategy as needed
- Click “Create” to generate your pacing plan
For more details on creating plans, see the Create/Modify Plans documentation.
Adjusting Your Plan
Changing the Speed (Same Distance)
If you want to speed up or slow down your pace while keeping the same distance:
- Go to your course page and select your existing plan
- Click “Actions” → “Modify Plan”
- Adjust the elapsed time target to your new desired finish time
- Save the modified plan
Changing the Distance (Same Time)
If you want to adjust the target distance while keeping the same elapsed time:
- You need to modify the course itself
- Click “Actions” → “Modify Course”
- Navigate to “Step 2: Source data”
- Change the number of loops to your new target
- Save the course modifications
- Your existing plans will automatically update to reflect the new distance
Creating Multiple Distance Plans
If you want to have multiple plans with different target distances (e.g., “A Goal” at 100 miles, “B Goal” at 80 miles):
- Copy the original single-loop course for each distance goal
- Set the appropriate number of loops for each course copy
- Rename each course appropriately (e.g., “24hr - 100 Mile Goal”, “24hr - 80 Mile Goal”)
- Create plans on each course with your target elapsed time
This approach gives you separate courses for each distance goal, each with their own pacing plans.
Tips for Timed Events
- Start Conservative: Timed events reward consistency. Consider using a conservative pacing strategy to avoid early fatigue.
- Aid Station Delays: Be realistic about your aid station time. In timed events, efficiency at aid stations can significantly impact total distance covered.
- Loop Familiarity: One advantage of looped courses is that you’ll become very familiar with the terrain, which can help you pace more effectively on later loops.
- Monitor Progress: During the event, use ultraPacer’s Live tracking features to see if you’re on pace for your distance goal.
- Heat and Darkness: For long timed events (12+ hours), make sure to set accurate start times so the heat and darkness models can factor into your pacing predictions.
Limitations
Currently, ultraPacer doesn’t have native support for “looped plans” where you can specify a time duration and have the system automatically calculate how many loops you can complete. This feature is planned for future development.
The workaround described above requires creating separate course copies for different distance goals, which means:
- You can’t easily compare multiple distance scenarios in one place
- Adjusting the number of loops requires modifying the course, which updates all plans for that course
- Each distance goal needs its own course copy
Despite these limitations, this approach still provides valuable pacing guidance for timed events by leveraging ultraPacer’s comprehensive models for grade, terrain, altitude, heat, and fatigue.
Questions or Feedback?
If you have questions about using ultraPacer for timed events or suggestions for improving this workflow, please reach out through the contributing page or contact support.
What's new?
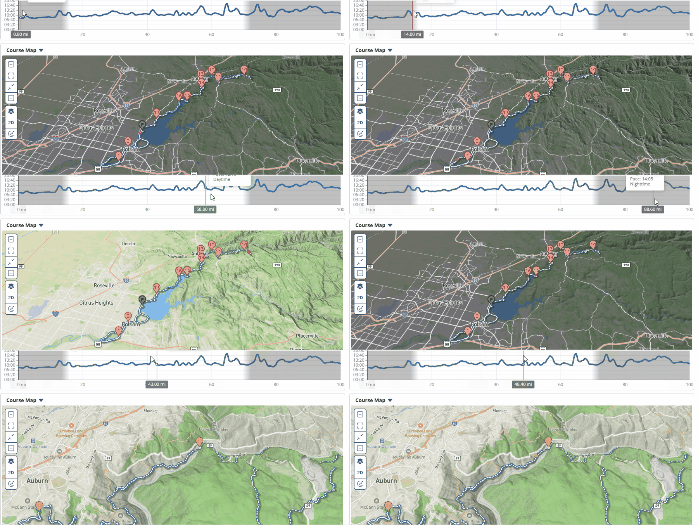
Dynamic sun shading!
The map now adjusts lighting based on the sun’s position throughout your run. Watch shadows shift and terrain illuminate realistically as the time of day changes, giving you a better sense of conditions on course. | Plus/pro feature